
Graveyard Keeper 2 Factory Layouts — Automation & Production Lines
Graveyard Keeper 2 factory and workshop layout tips: cheap conveyor routing, buffer chests, a copyable first supply line, and the zombie cost of real automation.
FAQ
How many zombies do you need to run the factory in Graveyard Keeper 2?
Why does my machine show 0 resources in Graveyard Keeper 2?
What is the most power-efficient conveyor setup?
Can you move buildings in Graveyard Keeper 2?
What should you automate first in Graveyard Keeper 2?
How do you lay out a factory in Graveyard Keeper 2?
Lay it out one production line at a time: a storage hopper feeding a short conveyor run into one machine, with the machine’s output landing in a chest or at a supply station where porter zombies carry finished goods to the warehouse cellar. Because deconstruction underground refunds 100% of your materials, a wrong first draft costs you nothing but time.
That refund is the single most important thing to know before you plan anything. A Steam community guide by lordfiSh puts it plainly — destroy a building inside the factory and you get every resource back, while buildings above ground refund only about half their cost (50 percent, per the same guide). Reddit players rebuilding their workshops report the same “about half” rule. The factory is the one zone where you can rearrange a line five times in an evening without losing a single plank, so treat your first layout as a prototype, not a monument.
The community’s own starting advice matches that philosophy: pick one useful product, get its materials moving, get something made, and get it delivered — then build the second line. The players who stalled all tried to wire up the whole factory at once. The players shipping weekly supplies started with a single flax field and a few belts.
The underground zone itself is connected to the rest of your operation in fixed ways: a tunnel links it to the yard, storage for farm produce drops in from a crane in the garden, and blocked passages to the mine and the tower basement open up as you clear them. Those fixed entrances are your layout’s frame — build around them rather than fighting them.

How to Automate Your Factory in Graveyard Keeper 2 — MrFlameturtle
How do conveyors, power, and storage actually work?
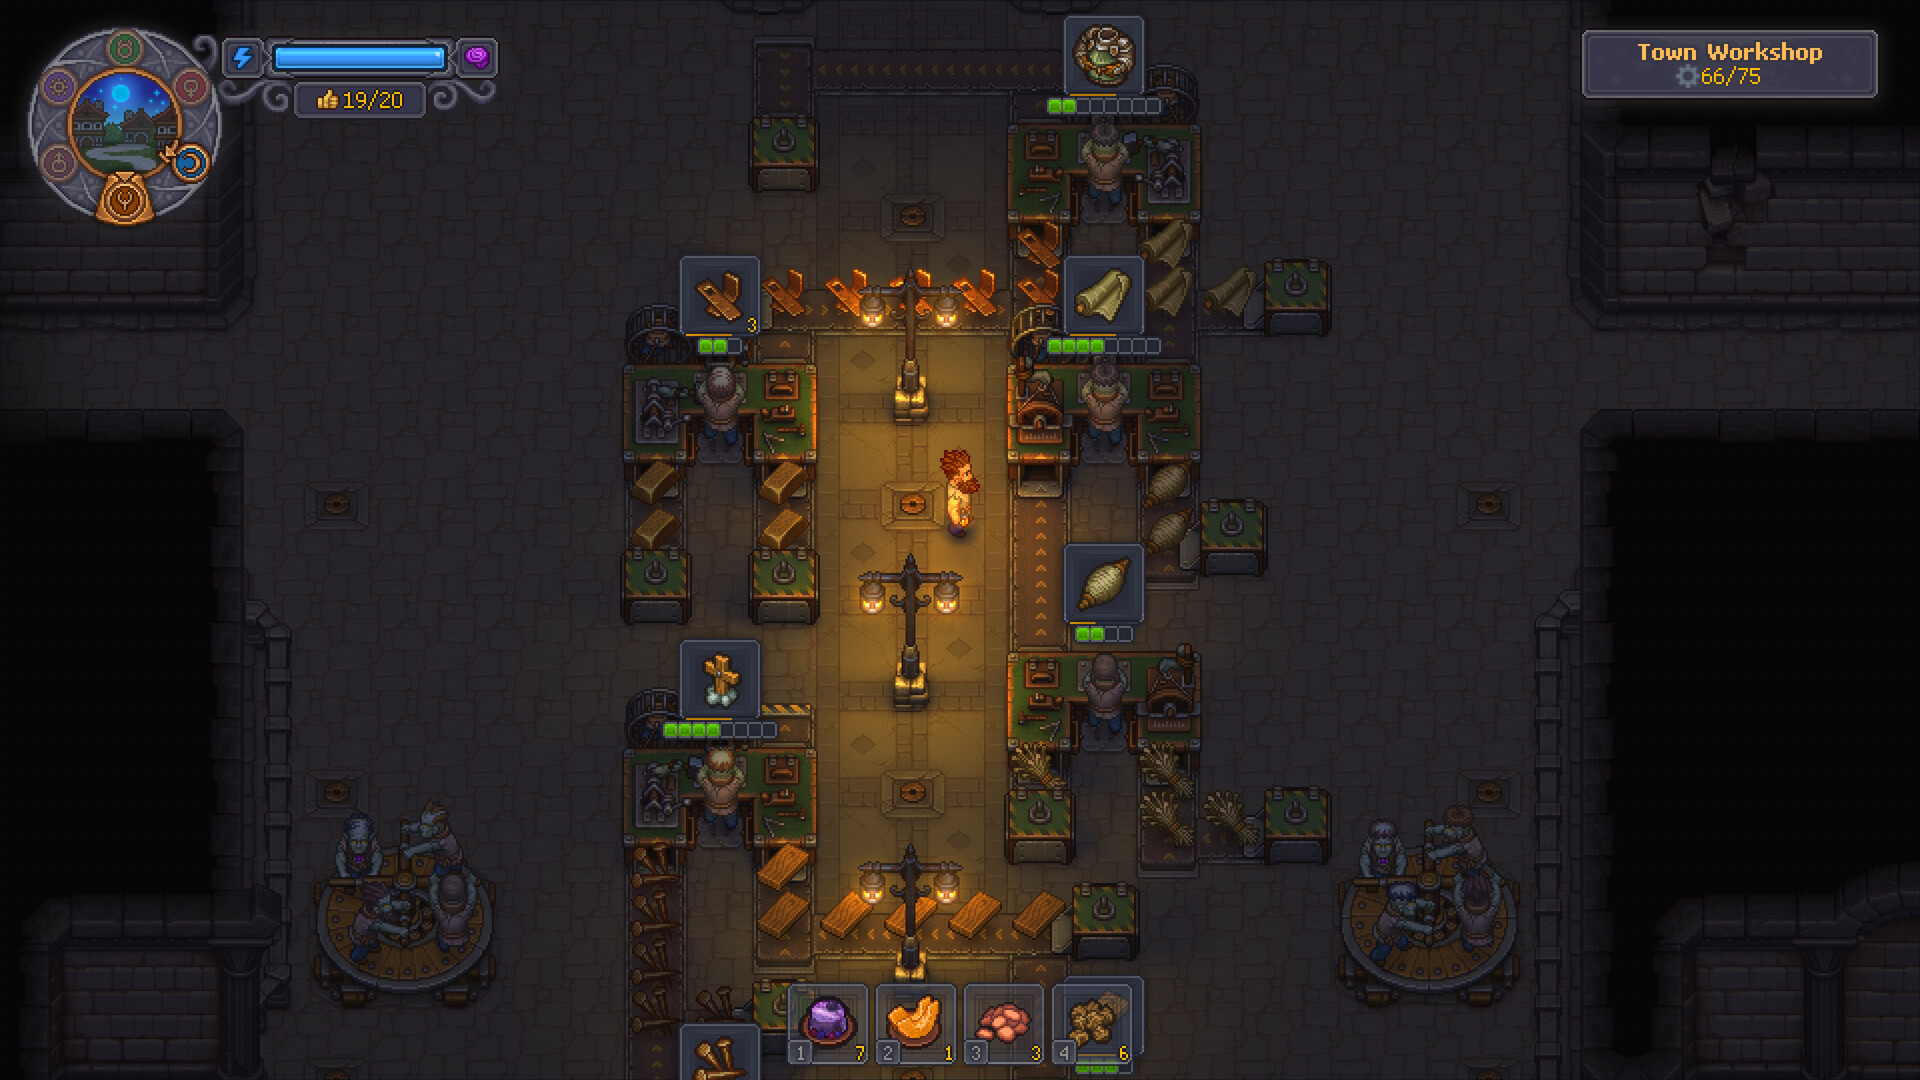
Every conveyor belt piece burns one energy, a zombie on a carousel wheel generates seven, and storage is what keeps a line fed: conveyor chests can be pre-filled, machines cannot. Route short runs between storages and machines, cross paths with underground belts, and let buffer chests absorb every speed mismatch along the line.
The pieces and their reported costs:
| Component | What it does | Power cost (community-reported) |
|---|---|---|
| Conveyor belt | Moves items one block per piece | 1 energy per belt piece |
| Underground conveyor | Tunnels under another belt or covers distance cheaply | Less power than the same run of normal belts |
| Conveyor chest | Belt-in, belt-out buffer you can stock by hand | None |
| Assembly workbench (+ upgrades) | Turns inputs into kits and supplies | One zombie operator |
| Supply station / supply pallet | Hand-off point where porters collect supplies for town delivery | One porter each |
| Zombie carousel (wheel) | Generates energy for the whole grid | 7 energy per zombie; several zombies can share one wheel |
Three rules fall out of that table. First, buffer everything: you cannot pre-fill an assembler, but you can pre-fill a chest, so a stocked conveyor chest in front of each machine keeps the line running while porters catch up. Second, short beats long: a belt across the whole map wastes one energy per block forever, which is why players recommend filling key chests by hand until the factory’s own storages are wired. Third, never let two belts cross into each other — use an underground belt as the tunnel or a splitter to divide a stream.
One quirk catches everyone: a freshly connected machine shows 0 resources even though items are visibly riding the belt toward it. That is normal. Queue a recipe and the machine starts pulling from the belt on its own.

Setting Up Factory Guide in Graveyard Keeper 2 — Quick Tips
What is the best first production line to automate?
Flax into fabric supplies is the community’s favorite first line: one gardener, one assembly workbench with the spinning wheel upgrade, two porters and one or two carousel zombies keep it running on a handful of belts. Vegetables into crates is the usual second line, copied once the garden crane and a kitchen are wired up.
lordfiSh’s guide spells out the starter kit for the flax line, and it is small enough to build in one sitting:
- 1 gardener (surface) + 1 assembly workbench operator + 2 porters + 1–2 carousel workers
- 4 conveyor belts, 1 supply station, 1 supply pallet
- Assembly Workbench with the Spinning Wheel upgrade
The chain itself is short: flax drops from the garden crane into the factory’s storage, a short belt feeds the workbench, the operator turns flax into fabric supplies (16 flax per batch on the Spinning Wheel setup, per lordfiSh’s guide), and the porters carry the output from the supply station and pallet toward the warehouse cellar. Choose the supply recipe variant when the goal is town commerce — supplies are what warehouse orders ask for, and our town orders guide shows how those orders pay out.
Why flax first and not vegetables? Several players independently reached the same answer: vegetable products sit behind extra research and more machinery, while flax needs almost nothing unlocked. One player’s arithmetic made the case for supplies in general — a single cloth-package assembler covered both weekly merchant orders and banked roughly 50 reputation a week, with a talent that boosts merchant-quest rewards pushing it higher.
Veggie crate line, step by step (community recipe)
A second line reuses everything the flax line taught you, plus the crane:
- Upgrade the garden’s Lifting Crane and enable the crops you want sent down (carrots are the usual pick) under “Items for transportation.”
- Place a kitchen a few spaces below the farm storage at the top-left of the factory, where the crane drops goods.
- Run a belt from the storage’s output hopper to the kitchen’s input.
- Give the kitchen’s second input its own chest and conveyor chest — and do not let the two belts cross.
- Fill that chest with crates.
- Set the kitchen to craft carrot veggie crates.
- Run a belt one space from the kitchen’s output, then end the line in a supply station — this is where the delivery porter picks up.
How do you feed raw materials into the factory?
Raw resources enter through dedicated storages inside the factory: iron and coal come up from the mine, stone and marble from the rocks outside its entrance, clay and sand from the digs beside it, and logs from a lumberjack house to the southwest. Each site needs working zombies plus courier zombies hauling the output back to the right hopper.
| Resource | Where it comes from | Who moves it |
|---|---|---|
| Iron & coal | Inside the mine | Miner zombies + a courier to the factory |
| Marble & stone | Rocks at the mine entrance | Zombie diggers, via a chest, then a courier |
| Clay & sand | Digs to the left of the mine entrance | Zombie diggers + courier |
| Logs | Lumberjack house southwest of the mine | Logger zombie + log porter |
| Crops | Your garden, dropped by the Lifting Crane | Automatic once the crane is set |
Two details in that table trip people up. Stone and marble reportedly need a chest step — a zombie moves them into a chest first, and a second zombie carries them onward — so leave floor for both a chest and a worker at that stop. And whole logs will not fit in a workstation’s input chest at all: they go into the factory’s dedicated log storage by hand, and the belts take over from there.
The garden side is cleaner. Build the Lifting Crane, tick which crops it should send down, then open the matching storage inside the factory and set its item selector at the bottom — without that selector, the storage fills with the wrong items or clogs entirely. From there a short belt run feeds whatever kitchen or bench the crops are for.
Wood deserves its own mention because it is the resource players automate first above ground. Born 2 Game’s walkthrough of infinite raw-material wood gathering shows the full surface loop — and its point generalizes to the factory: fill a resource chest to the brim, then reassign those gatherers elsewhere. A stocked buffer buys you days of production without locking zombies into permanent hauling duty.

How to Automate Wood Gathering in Graveyard Keeper 2 — Born 2 Game
What does a good workshop layout look like?
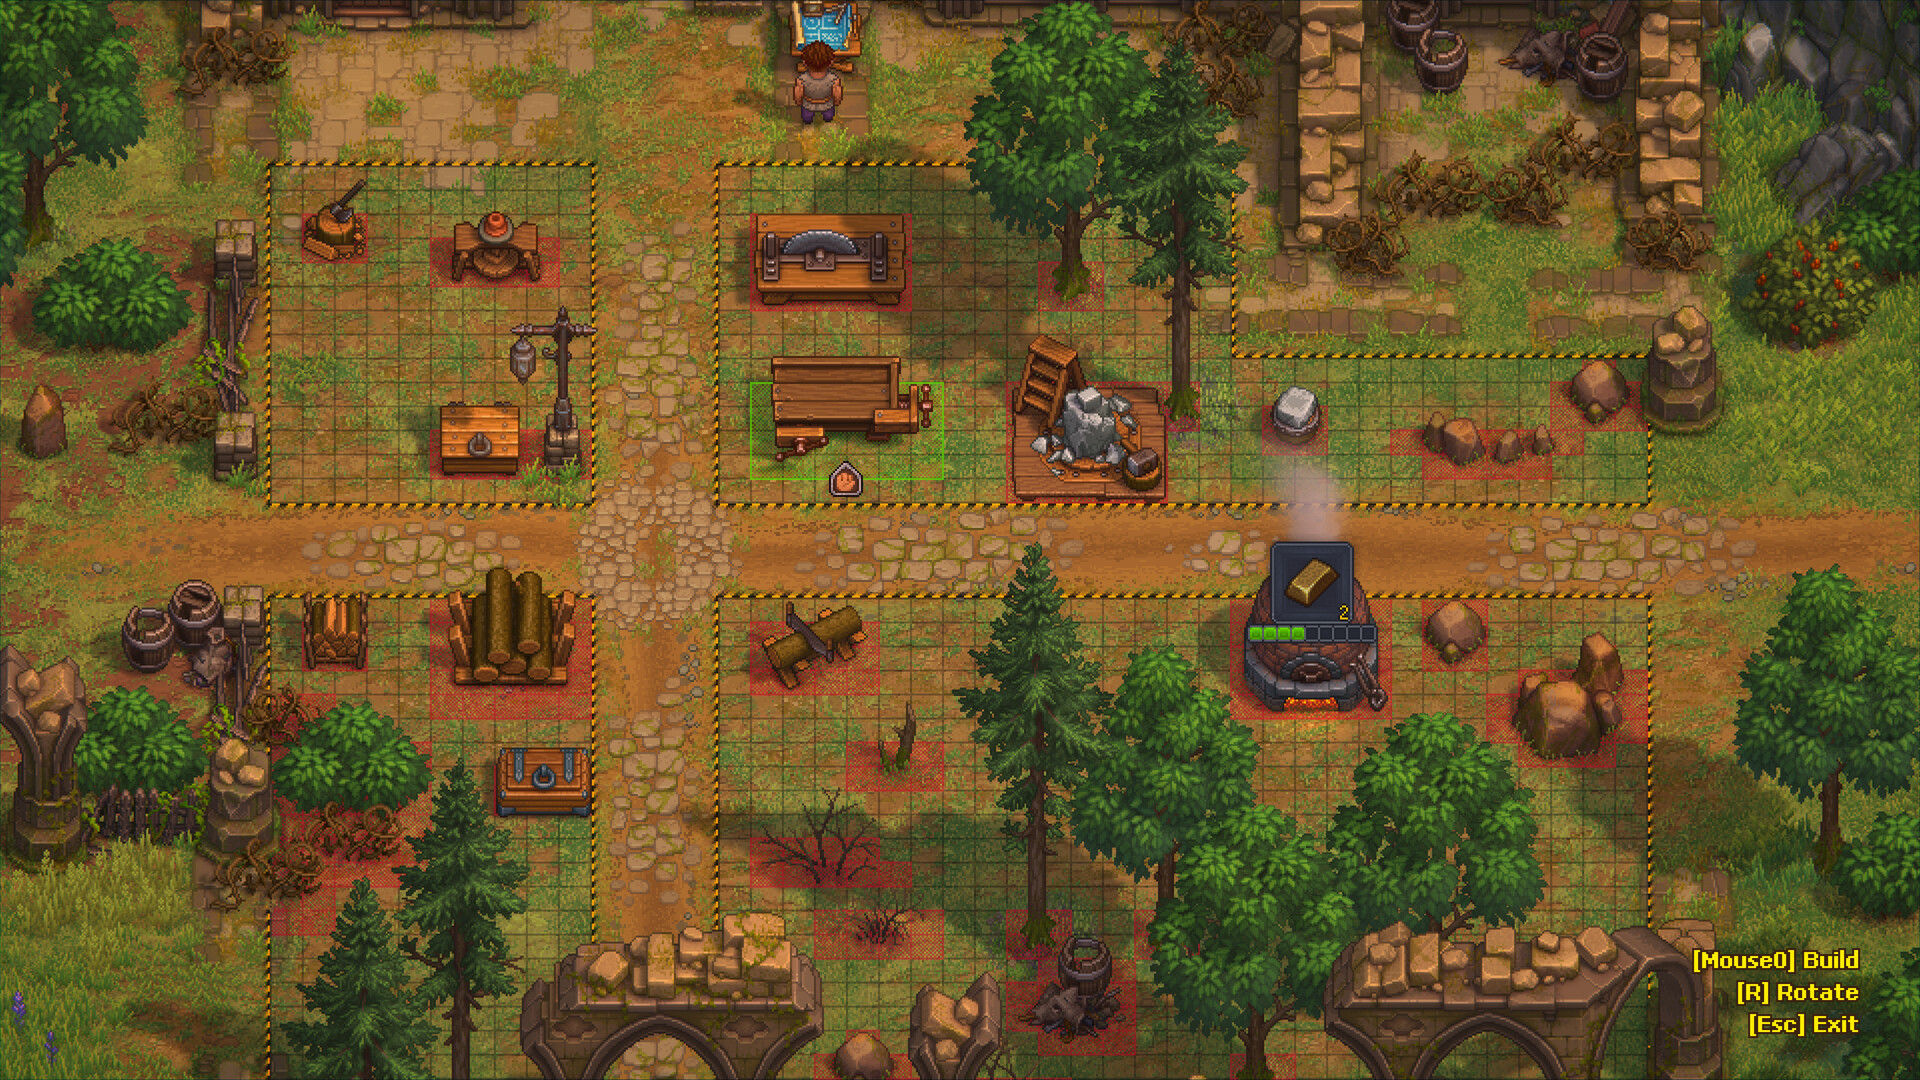
A workshop layout lives or dies by porter coverage and extension spacing: every station grabs its own materials from nearby chests, furnaces want bellows with two squares of clearance, and two copies of your top bench let you craft by hand without stealing the zombie’s station. Keep firewood sheds close, because every furnace and oven eats fuel.
The porter rule is the one launch-week players learned the hard way: unlike you, a zombie at a bench will not pull stock out of a distant room, so each cluster of stations needs porter zombies shuttling between chests and machines. The community’s planning layouts assign porters as deliberately as workstations — one player added two more porters late-game purely to keep existing lines fed.
For the stations themselves, three spacing facts matter more than taste:
- Furnaces need bellows. The bellows is an extension, and planning layouts reserve the two squares of clearance around each furnace for it. A furnace without room for bellows is a rebuild.
- Duplicate your best bench. Two max-level copies of a bench — one assigned to a zombie, one free — means you can hand-craft an urgent order without erasing the zombie’s queue.
- Firewood sheds belong in the plan. Planning layouts pack two Firewood II sheds into a corner; the fuel feeding chain is part of the layout, not an afterthought.
The workyard around your graveyard follows the same logic. A player who maxed out every relevant workstation reports the yard fits them all — with room to squeeze in a sixth furnace if you optimize — and recommends pressing the storage area right against the factory entrance so porters waste no steps. One tooling note from the same thread: fine tools do not replace the basic ones at benches like the workbench or stonemason’s; your layout needs rack space for both.
How many zombies and how much power does a factory need?
Plan on roughly ten zombies gathering, ten more generating power, and one operator per station before the factory feels alive — launch-week players doing this math report needing 45 to 54 zombies for broad automation. One carousel zombie yields about seven energy, a single veggie supply chain ate around 27, and several zombies can share one wheel.
Those are community estimates, not game data, but they all point the same direction: the factory’s real cost is bodies. One player’s ledger for the gathering side alone — loggers, diggers, miners, and a courier for each resource — ran to 11 zombies before a single production station was staffed, with room for 5 more to max out every resource site.
To reach those numbers you need throughput on the resurrection side, and the community found the levers:
- More resurrection tables, more zombies per week. Players confirm resurrection is not hard-capped at one per Envy Day — multiple tables mean multiple raises in the same week.
- Prayer for Storms grants a buff that lets you resurrect on any day while it lasts, with the catch that debuffs stack.
- Exhumation is the late-game accelerant: buy Exhumation Certificates from Januarius in the village tavern — his stock is limited and refreshes weekly — and raise prepared bodies on demand.
- The PR machine is upkeep, not a one-off: it consumes newspapers and charged hypno devices on Gluttony to raise your weekly allowance, and going over the zombie limit applies a debuff that weakens your sermons.
Which layout mistakes should you avoid?
The expensive mistakes are all placement mistakes: surface buildings refund only part of their materials, buildings cannot be moved after the fact, and a station built without clearance for its extension forces a full rebuild. Underground you can experiment freely — the factory refunds everything — so prototype there and copy the pattern upward carefully.
The launch-week hall of shame, so you can skip every lesson:
- Placing surface buildings before you know their extensions. Discovering that a furnace needs a bellows — or that a table needs an extension with no floor left beside it — means demolish, re-collect, rebuild. Plan extension space first.
- Trusting belts to sort themselves. Two belts that cross into each other mix inputs and starve machines; underground belts and splitters exist precisely to keep streams separate.
- Wiring the whole factory at once. Players who committed to “specific kits” they could actually supply got further than players who built a station for every product in the tech tree — with finite energy and zombies, breadth kills throughput.
- Assuming pathing just works. Zombies wedged between workstations, chests and extensions were common enough that Update 1.006 shipped several fixes for exactly those stuck states; leave walking room even though the patch helps.
- Queueing compost on autopilot. The manual-only compost pile (see above) has already cost players who queued hundreds of units and then found none banked.
One more meta-mistake: expecting to fix placement mistakes cheaply above ground. There is no move-buildings feature in the base game — a mod exists on PC, and console players have neither option — so the 100%-refund factory is not just a production zone, it is the only place where a layout mistake is free.
Should you automate everything, or keep crafting by hand?
Automate the supplies that repeat every week and hand-craft the rest: one cloth-package assembler was enough to cover both weekly merchant orders and bank roughly 50 reputation a week for one player, while story-gated products like steel stay manual until their quest chain opens. Factories reward the boring loops, not one-off crafts.
The practical division the community settled on: the workshop handles your own crafting and early orders, the factory takes over anything with a weekly cadence — supplies for warehouse orders, trade goods, the chains you would otherwise grind by hand every cycle. Silver from those repeating lines adds up fast; our money making guide ranks where it lands among the other income streams.
Keep the workforce side honest, too. The basics — worker-plus-supplier pairing, tools, perk trees — carry over from the yard to the factory unchanged, and our zombie automation guide covers them in depth; the items and materials overview lists what every belt, bench and chest costs to build. A factory is just that pairing, stamped out at scale — master it once underground, and the production lines design themselves.
Related Articles
achievements
Graveyard Keeper 2 Achievements Guide — Full Checklist & Missables
All 38 Graveyard Keeper 2 achievements with unlock conditions, the five hidden ones, global unlock rates, and an honest look at what is actually missable.
guides
Graveyard Keeper 2 Beginner Guide — Your First Days in The Town
A launch-week starter route for Graveyard Keeper 2: what to do first, which day unlocks what, how faith and insanity work, and the GK1 habits to unlearn.
guides
Graveyard Keeper 2 Corpse & Autopsy Guide — Best Bodies & Red Skulls
How the autopsy system works in Graveyard Keeper 2: organ swap rules, the Oops Surgeon inspiration trap, embalming fluids, grave rating, and red-skull zombies.
Was this helpful?
Thanks for the feedback!