
Graveyard Keeper 2 Corpse & Autopsy Guide — Best Bodies & Red Skulls
How the autopsy system works in Graveyard Keeper 2: organ swap rules, the Oops Surgeon inspiration trap, embalming fluids, grave rating, and red-skull zombies.
FAQ
What do red skulls do in Graveyard Keeper 2?
Do corpses decay in Graveyard Keeper 2?
Why is my grave rating lower than my corpse's white skulls?
Should I max the autopsy skill tree right away?
Can you add blood or fat back into a corpse?
How do you make a high red-skull zombie?
How does the autopsy system work in Graveyard Keeper 2?
Every body in Graveyard Keeper 2 carries two scores: white skulls and red skulls. The autopsy table is where you set them — removing and swapping organs to shape what the corpse becomes. White skulls feed grave rating and sermon money, red skulls cap a zombie’s perk potential, and every cut you make is permanent for that body.
Corpses stop being passive deliveries in the sequel. Bodies barely decay anymore — players report keeping usable corpses for a hundred in-game days — so the morgue becomes a workshop where every arriving body is inventory, not a ticking clock. The loop is simple: a corpse arrives from the Town, you read its two skull counts, and you either rebuild it for a burial plot, strip it for parts, or reserve it for resurrection. Because the morgue only holds a couple of unburied bodies at a time (our beginner guide covers the opening loop), you want a standing decision for every delivery.
The two scores do completely different jobs:
| Score | Feeds | Grows with | Cut by |
|---|---|---|---|
| White skulls | Grave rating → sermon money | Good organs, white embalming fluids | Removing good parts, red serums, surgeon’s mistakes |
| Red skulls | Zombie perk potential | Bad organs installed, red embalming serums | Removing bad parts, white serums |
What do white skulls and red skulls do in Graveyard Keeper 2?
White skulls are the burial currency: a corpse’s white skull count is the ceiling of what its grave can ever be worth. Red skulls do nothing for graves — they set how many perk points a resurrected zombie can learn. One corpse can only serve one master, so pick between graveyard rating and zombie parts before you cut.
This trips up returning players, because the sequel inverts the first game’s zombie math: in Graveyard Keeper white skulls used to make zombies work faster, while here community testing says red skulls are the zombie stat — they gate how many perk points a worker can bank (players report white skulls have no effect on a zombie’s speed). The confusion is common enough that it shows up weekly on the game’s Steam forum, so double-check which score you are looking at before an expensive operation.
How do you perform an autopsy step by step?
Put the body on an autopsy table and click an organ slot to remove or swap a part. The six main organs — brain, heart, guts, skull, bone, and skin — can be swapped between bodies; blood, fat, and flesh can only be taken out. Success depends on your mastery, and a failed cut destroys the part entirely.
A practical workflow, assembled from launch-week player reports:
- Drag the corpse onto the autopsy table. Both table tiers work; see the note below on Table II.
- Remove everything below your quality bar first. Junk parts are the raw material for red-skull zombie bodies later, so bank them in a chest near the table instead of selling — our items and materials guide lists what stockpiles are worth keeping.
- Install your best organs. Click an empty slot and place a banked part. Organ quality tiers matter — players talk about normal, blue, silver, and gold variants of the same organ.
- Mind your mastery. Higher mastery raises the success chance of delicate cuts; a failure (a “surgeon’s mistake”) destroys the part outright and costs you skull value on the body.
- Send the corpse to its destination. Grave, embalming table, or resurrection table — white-skull builds go to plots, red-skull builds to the zombie line.
| Part type | Swap rule | Notes |
|---|---|---|
| Brain, heart, guts, skull, bone, skin | Remove and re-install freely (mastery-gated) | The six slots that decide a corpse’s build |
| Blood, fat, flesh | Remove only — never re-insertable | Fixed at delivery; the ceiling on minor-part skull value |
| Surgeon’s mistake | — | Destroys the part; costs the corpse -1 white and -1 red (reported independently by community testing and the game-data guide) |
Two table notes. First, community testing has not found any functional difference between Autopsy Table I and II — a bug report about it is open on the game’s own forum, and the working theory is the upgrade is cosmetic or speed-related. Second, one Steam player reports the tier-1 table effectively lowers your success rolls, which matters for the mistake-farming trick below.

Easy Tips How to Understand Organs & Skulls! (All Mechanics Explained) — PicaPinguin
Why shouldn’t you max the autopsy skill tree right away?
Do not rush the autopsy perks. One inspiration chain in the tree only advances when you fail autopsies — five ranks worth one inspiration point each, then a sixth that needs 25 total surgeon’s mistakes and costs 10 faith to buy. Raise your mastery first and you may never be able to fail again, locking the chain permanently.
This is the launch’s most upvoted community warning: a Reddit thread titled “Do not perfect autopsy skill immediately!” (nearly 400 upvotes) walked through the whole chain, and a parallel Steam thread (“Possible to lock out Oops Surgeon Inspiration”) confirms the math — 25 mistakes is all the final objective asks for. The community’s 73-inspiration database lists the chain the same way: six levels tracked by “mistakes during surgery,” with 23 faith to max — the same shape both threads describe. The design inverts every optimization instinct: the game rewards you for botching cuts, and only botched cuts. A player who reaches high mastery with clean hands has nothing left to fail with, which is why commenters in both threads describe restarting saves over this.
The safe-fail methods reported by players, in the order you should try them:
How to farm surgeon's mistakes safely (community-reported)
- Take your tools off before operating. Players report an unequipped tool set drops the success chance enough to fail on demand — and since the part would have been junk anyway, you lose nothing.
- Swap organs on zombies and fail the swap. A Steam thread confirms failed organ swaps on resurrected zombies count toward the chain. One player failed a normal-guts swap (77% success chance) against blue guts (53%) this way. The zombie keeps working; only your mistake counter moves.
- Use Autopsy Table I. The same thread reports the tier-1 table rolls worse than tier 2, which helps you stay in the failure band.
- Farm mistakes on junk bodies early, while your mastery is naturally low and the first three body parts are still risky — several players recommend banking the first 10-25 mistakes before investing in any mastery food buffs.
How do you build a high white-skull corpse for burial?
A burial-grade corpse is built in two layers: organs first, embalming second. Remove every low-value part, swap in the best organs you have banked, then stack embalming fluids on top. At launch the stacking shows on the corpse sheet but breaks in the grave — injected skulls are one known bug away from counting toward rating.
The organ layer is the part you control for free: players report corpses arriving with 20+ white skulls purely from good parts, and community white-skull records run from 25 up to 34 and beyond. The embalming layer multiplies on top: white fluids add white skulls, red fluids add red skulls while stripping white ones, and players report the injection amount scales with the fluid’s quality tier. Two mechanics matter for planning:
- Injections resolve all at once. Every loaded dose fires in one sitting — one player burned 20 fluids on a single body and jumped it to 61 white skulls. Load deliberately, not incrementally.
- The grave does not currently honor injected skulls. Multiple independent reports (a 120-upvote Reddit thread plus three corroborating posts and reports on Xbox) agree: the grave credits only the skulls the corpse had before embalming. Until it is patched, embalm zombies, not burial plots.

Graveyard Keeper 2 — 36 Skull Corpses Embalming Guide — BHTrix
How does graveyard rating work?
Grave rating is the wreath count your cemetery shows, added up per grave: the corpse’s white skulls plus the grave’s decorations, minus penalties from empty or worn-out plots. It converts straight into sermon money at 100 percent — but faith comes from the church interior instead, and only up to the town’s gratitude cap.
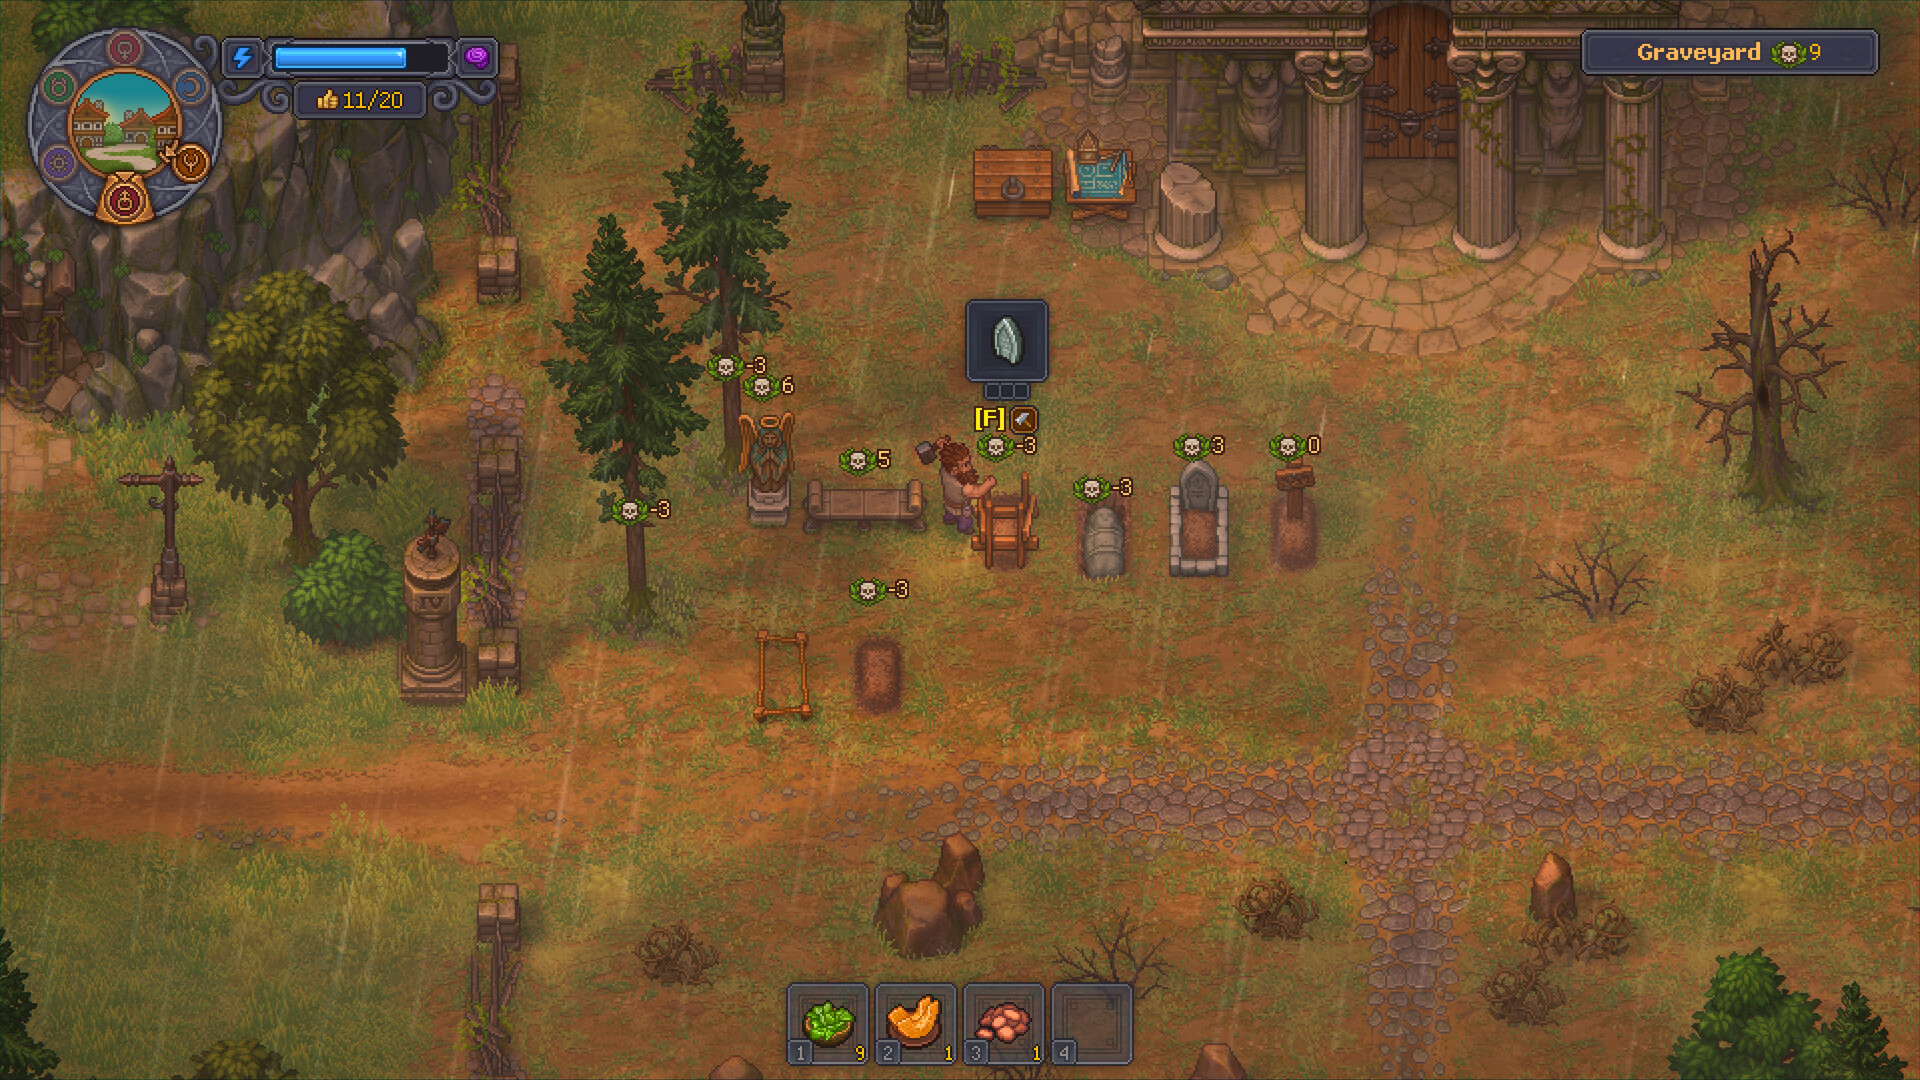
The official store screenshots show the system on-screen: every grave plot and decoration carries a small wreath icon with its own value (+3, +5, +6 for decent decor; 0 or negative for empty frames and ruined pieces), and the cemetery’s total shows next to the Graveyard label. That total is your sermon money engine. The community’s launch findings add the limits:
| Input | Reported effect |
|---|---|
| Corpse white skulls | Raises the grave’s rating ceiling |
| Tombstone, fence, cross quality | The actual rating — corpse skulls beyond your decor are wasted |
| Empty/ruined plots | Show negative wreath values (players report fresh plots sit at -3) |
| Decoration cap | ~14 wreaths with current marble-tier decor (two Reddit threads, both hedged) |
| Graveyard rating | 100% into sermon money |
| Church interior rating | Faith, capped by the town’s gratitude (raised by building houses) |
The practical consequence: corpse quality and grave quality must rise together. A 25-white-skull corpse on a wooden fence wastes both the body and the fence, while an over-decorated grave on a fresh corpse just idles decor value. Upgrade plots and decor in step with your best burials, and check the sermon breakdown screen after each service to see what actually converted. Where that money goes best is our money-making guide.
How do you make a high red-skull zombie?
Zombie quality is red skulls: they decide how many perks a worker can learn. Build red-skull bodies by swapping low-value organs into a fresh corpse on the autopsy table, then embalm it with red serums. Blood and fat are fixed at delivery, so the minor parts a body arrives with decide its ceiling.
The community’s discovery that changed how veterans treat early corpses: resurrected zombies can go back on the autopsy table and swap organs at any time, and the embalming table works on them too. Nothing about a zombie is final — collars can be swapped (the old one is consumed), tools and armor re-equipped, organs upgraded as you find better parts. A weak early zombie is a project, not a loss.
The reported recipe for a top-shelf worker:
- Pick a delivery with good blood and fat. Those slots never change, and they are part of the red-skull budget.
- Swap the six main slots toward red. Take the bad parts players have been banking from clean-up autopsies and install them — junk organs are literally zombie fuel here.
- Embalm with red serums for the final chunk of red skulls.
- Resurrect on Envy Day (the green day — timing rules in the beginner guide), then let the zombie’s own work fund its perks.

How Embalming Zombies Work in Graveyard Keeper 2 — Recreational Suffering
Where those red skulls pay off — job assignments, perk trees, and the zombie limit — is the territory of our zombie automation guide, which covers the workforce side end to end.
Related Articles
achievements
Graveyard Keeper 2 Achievements Guide — Full Checklist & Missables
All 38 Graveyard Keeper 2 achievements with unlock conditions, the five hidden ones, global unlock rates, and an honest look at what is actually missable.
guides
Graveyard Keeper 2 Beginner Guide — Your First Days in The Town
A launch-week starter route for Graveyard Keeper 2: what to do first, which day unlocks what, how faith and insanity work, and the GK1 habits to unlearn.
guides
Graveyard Keeper 2 Fast Travel Guide — How to Unlock All Waypoints
How fast travel works in Graveyard Keeper 2: unlocking the milestone pillars with faith, every confirmed waypoint location, activation costs, and carrying tips.
Was this helpful?
Thanks for the feedback!